When it comes to food, a little age usually makes things taste better. From wine and whiskey to cheese and even the chili you put in the freezer, letting things sit for a while deepens the flavor. This is certainly true when it comes to dry-aged beef.
Dry-aged beef is well known for its rich flavor, tender texture, and higher price tag, but did you know you can dry-age your own beef? Today, we’re going to answer all your questions about dry-aged beef, starting with “what is dry-aged beef?”
Table of Contents
What is dry-aged beef?
Dry-aged beef is like any other type of food-aging process, such as aging cheese, where you are essentially controlling the process of decay. Carcasses are hung in a humidity-controlled room so all sides are exposed to the air. “Good” mold then grows and pulls the moisture out of the meat. When the beef is served, the moldy meat is cut away, leaving the flavorful meat behind.

What does dry-aged beef taste like?
Generally, dry-aged beef has a much more “meaty” or even gamey taste, often with a slightly yeasty, cheesy, or nutty flavor. It may have a sweeter or butterier flavor.
What is the texture of dry-aged beef?
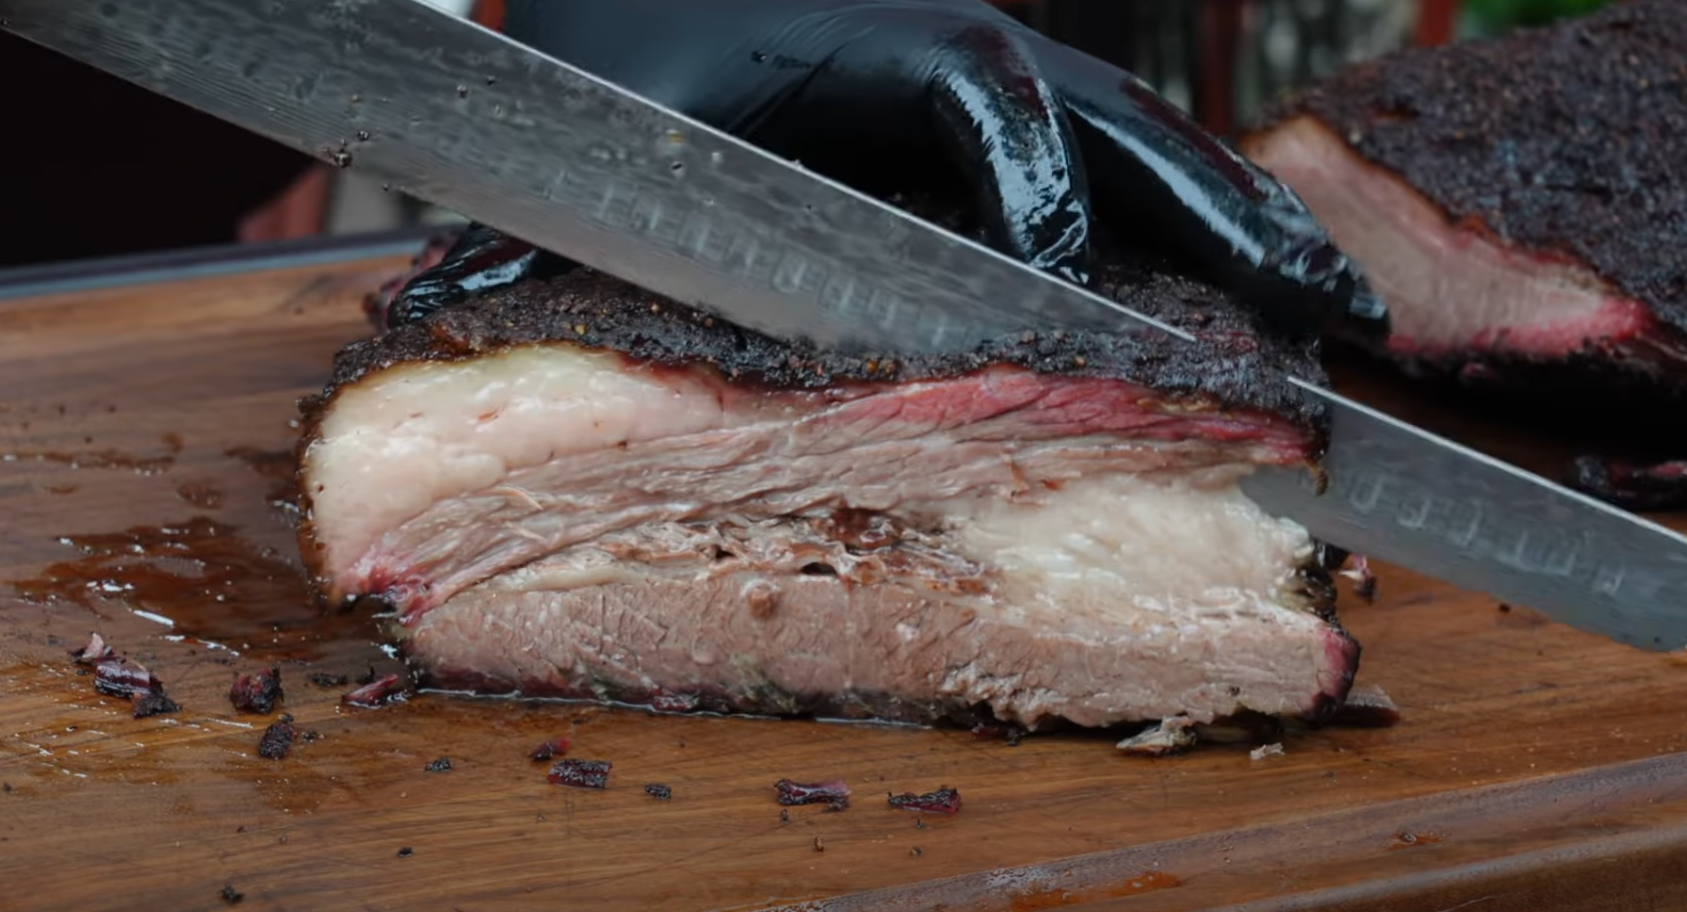
Dry-aged beef is very tender – it’s soft and is easy to chew and swallow. If you’ve heard of melt-in-your-mouth meat, this is it.
What’s so good about dry-aged beef?
Did the above not get your mouth watering? People who love dry-aged beef love it for all the above factors, and any steak-lover should try it at least once. It nearly always becomes a favorite.
Why is dry-aged beef so expensive?
It’s more expensive because it takes longer to get to you – so takes more work. When you have a steak, the animal is slaughtered and the meat makes its way to your plate within just a couple of days. Dry-aged beef requires special conditions and preparation, and depending on who prepares it, it can age from anywhere between 7 days to 120 days! Most take a full month, at about 30-35 days.
Wet-Aged Beef vs. Dry-Aged Beef: What’s the difference?
Wet-aged beef doesn’t take as long as dry-aged beef, so you don’t usually get such a deep flavor profile, nor is it as tender. Wet-aged beef is juicy, since there is no moisture loss, and is more affordable. They both taste good, though most find dry-aged beef more flavorful and the texture more desirable. Here’s a YouTube video of some guy’s version of that.
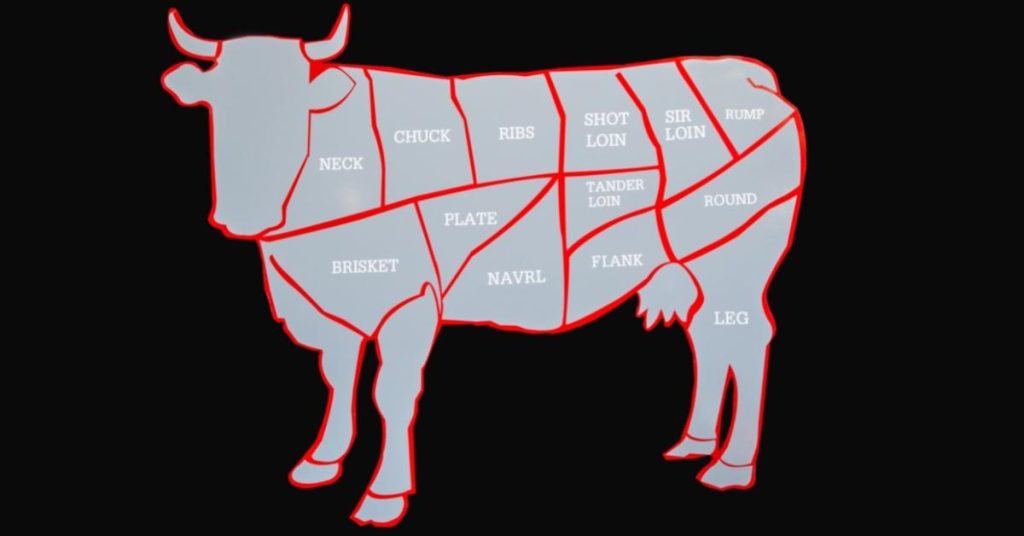
What are the best cuts of beef for dry aging?
The best cuts of beef for dry-aging beef at home are large cuts or sub-primal cuts on the bone, such as:
- Strip loin
- Ribeye
- Sirloin
- Rump
- Fillet
- Rump eye
In general, cheaper cuts of beef produce better results.
Is beef the only meat that is dry-aged?
Yes and no – people do “dry-age” other animals, such as deer or hogs after a hunt, but you can’t hang them for long (typically just 2-3 days) and you won’t get such flavorful results. The reason why, in general, only beef is dry-aged is due to the size – you need a large surface area to get the right results – and because cows are older before they are slaughtered and so there are fibrous tissues to be broken down that usually aren’t in other meats.
Some pork products, such as Prosciutto, are dry-dry aged, so if you hunt hogs or deer, you can try dry-aging those meats, but it’s best to start with beef for at-home dry aging.
How does the dry-aging process work?
It starts with a processed cut of meat – this is usually a large cut or part of a carcass. You can use single steaks at home, and restaurants may do it this way, but in general larger cuts are used (since you can get more profit).
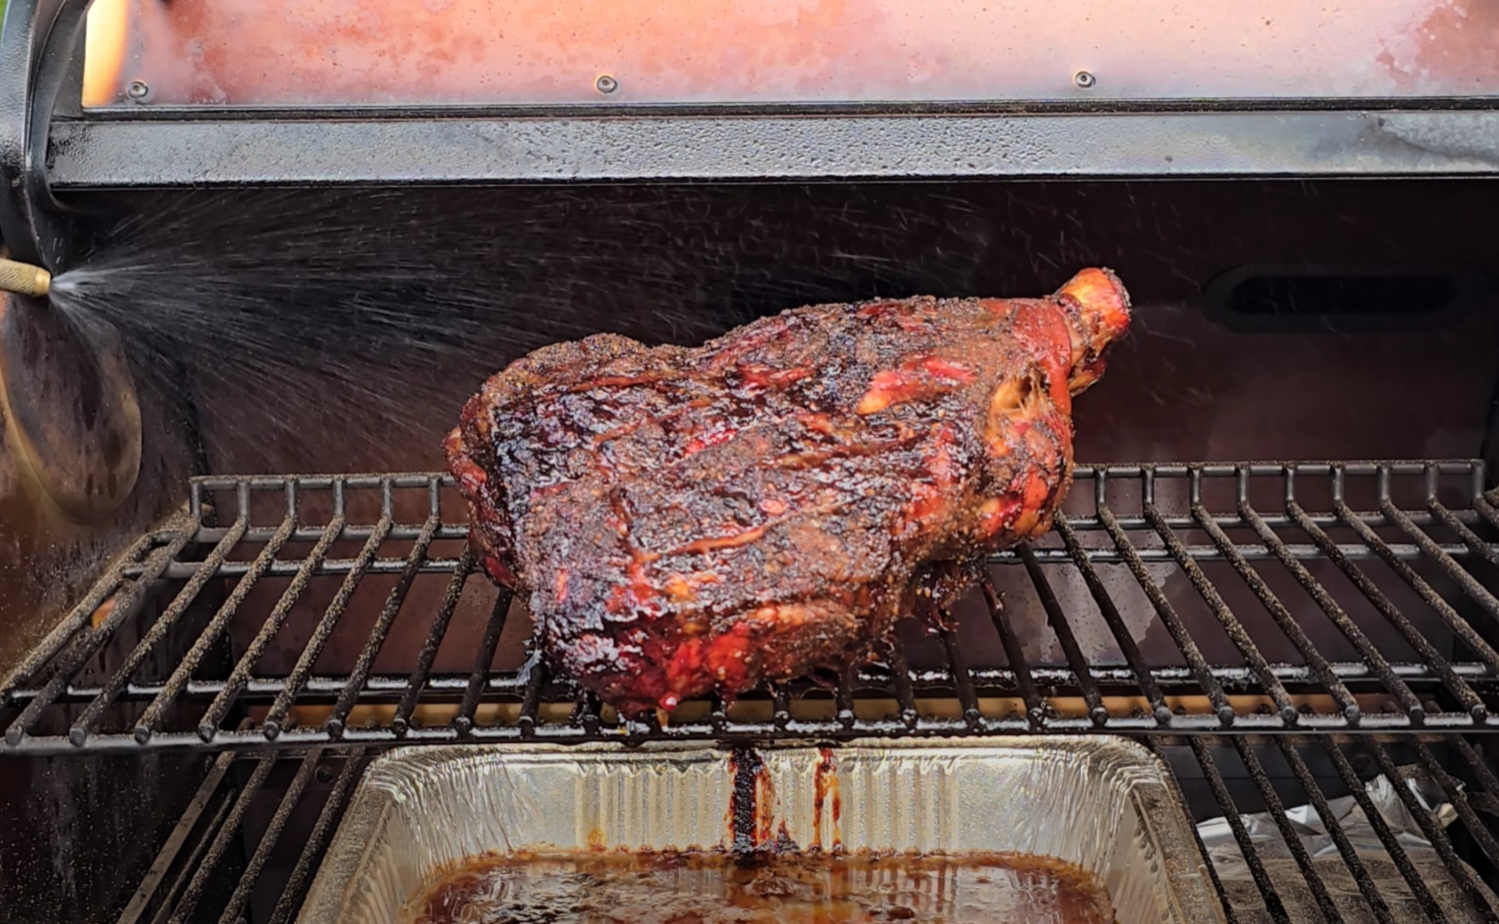
This cut of meat is then hung (or placed on a rack) in a temperature and humidity-controlled room for 7-120 days, averaging around 1 month. During this time, the enzymes in the meat start to break down fibrous tissue, and mold often grows on the outside of the meat.
At 7 days in, the collagen in the meat starts breaking down.
At 21 days in, the meat will have lost 10% of its weight in moisture.
At 30 days, there is usually some white mold on the outside of the meat, and it’s ready to eat, having lost 15% of its weight in moisture and the enzymes having broken down much of the collagen.
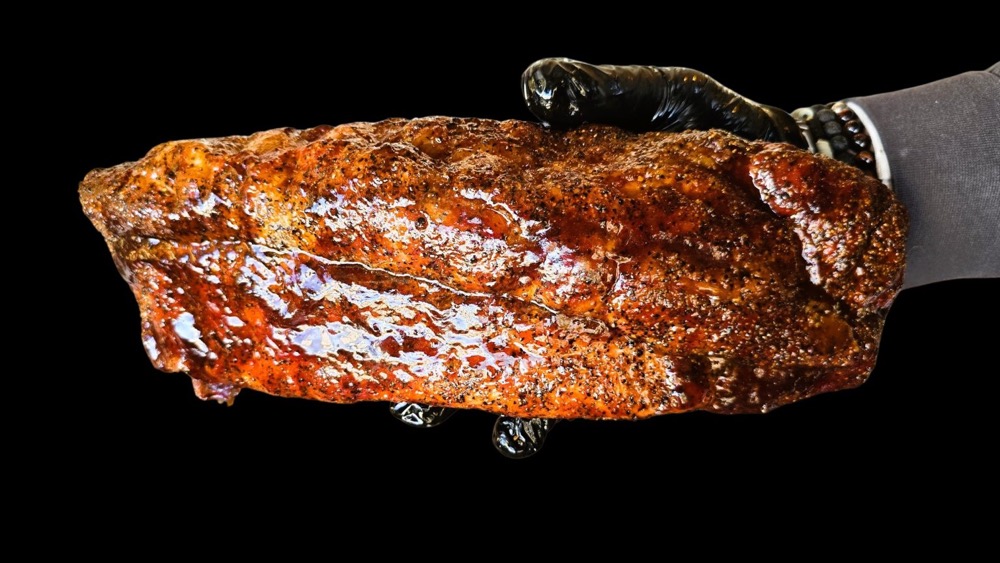
The outside of the meat is then trimmed and the meat can be gently cooked and eaten.
How to Dry-Age Beef at Home
Step 1: Prepare Your Fridge
If you’re planning to do dry-age meat often and you’re not afraid to spend a bit to do it, you can get a purpose-built dry-aging fridge for your garage or utility room.
Fortunately, that’s not your only option – you can mimic the same conditions with a standard small fridge (such as a wine fridge, since the glass door helps), a thermometer, an electric fan, and a wire rack.
The thermometer will help you ensure the temperature stays consistent (this doesn’t need to be anything special – an aquarium thermometer will work fine, though one that also measures humidity is worth the investment) and the wire rack will ensure the air circulated by your fan can reach all sides of the meat.
Set the temperature of the fridge to around 35F. It can be a little lower or a little higher, but anything higher than 40F will cause the meat to spoil, so definitely lean toward lower temperatures.
The humidity in your fridge should be around 65-85%, though again, the lower end of this is best since the meat will spoil at higher humidity levels. Adding some rock salt to the bottom of your fridge will help absorb excess moisture, and is a good idea regardless if you don’t have a humidity thermometer because overdrying your meat won’t do much damage.
Can I just use my normal fridge?
No – at least, it’s not a good idea. For one, your meat will either “taste like fridge” or make everything else in the fridge that’s not sealed in an airtight container taste or smell vaguely of uncooked, aging meat. Besides that, you’re also going to be opening the door several times a day, which will change the temperature and humidity regularly, and the other food in the fridge will usually increase the humidity.
Step 2: Select Your Cut
The cut you select to dry-age at home is entirely up to you, but ribeye is usually best. Do not buy individual ribeye steaks – they’re just not big enough. If you age a ribeye steak, you’ll be left with something the size of turkey bacon by the time you’ve trimmed the outside. Buy a sizeable rib steak. If you go to your local butcher and tell them you plan to dry-age it, they can recommend a cut for you.
Step 3: Prepare Your Cut
This step is simple – it’s to get it to your fridge as fast as possible (we’ll discuss this in step 3) so random opportunistic bacteria can’t get on it. You also don’t want to do any trimming or bone removal. Don’t put it on a plate – either leave it bare or wrap it gently in a cheesecloth (or another permeable fabric). Then place it on a wire rack in your fridge, or hang it, if the option is available.
Step 4: Age the Cut
The next step is to allow it to age. Most people wonder how long they should age their cut for at home, and the sweet spot is usually between 21-30 days – 28 days probably being about the optimal time frame.
How do you know if your dry-aged beef has gone bad?
If you followed our tips on humidity and temperature above and made sure your cut was kept clean from the source (store or butcher) to your fridge, it shouldn’t have gone bad. The cut will likely have some white or a little blue-green mold on the outside. If the mold looks like something you’d see with cheese, you’re likely okay.
However, if there’s a lot of blue or green mold, all may not be well. Unless there is an obvious sign that the meat has gone bad, go ahead and trim the outside of the meat and get a look at the inside – it should look like something you want to eat. If it’s off-color or slimy, throw it out. Yes, it hurts to get rid of meat you’ve taken an entire month to prepare, but it’s not worth the risk.
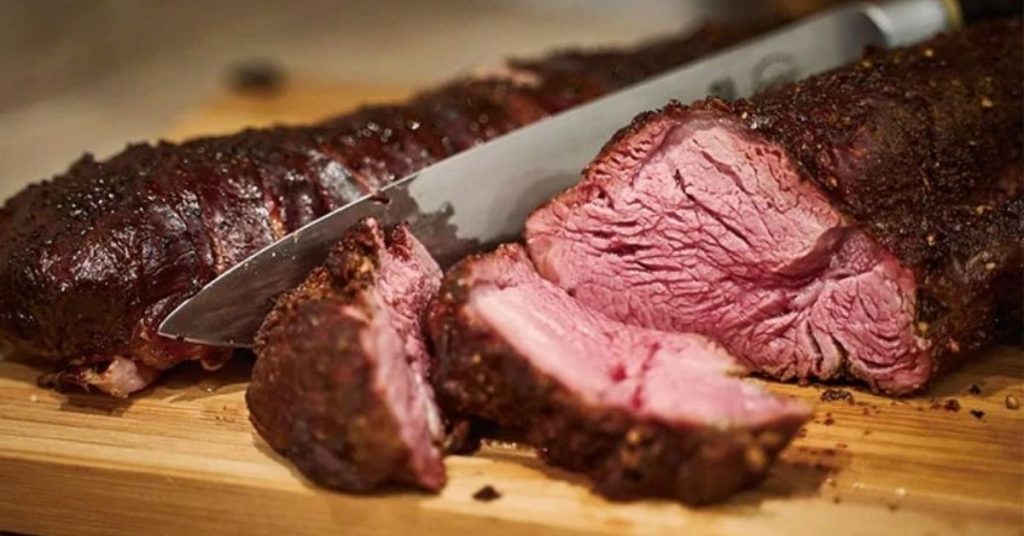
How to Cook a Dry-Aged Steak
Cooking a dry-aged steak is simple, here’s what you need to do:
- Season the steak with salt and pepper (don’t do this ahead of time or you’ll draw the remaining moisture out of the meat)
- Prepare your wood pellet grill to sear your meat – set it to the highest temperature, or around 450-500F.
- Sear each side of the steak for 1-2 minutes.
- Drop the heat to medium-high and allow the steak to cook for 3-6 minutes. Since it’s dry-aged, we recommend 3-4 minutes, turning every 1-2 minutes.
- Remove it from the heat and allow it to rest for 5 minutes per 1 inch of thickness.
- Serve and enjoy!
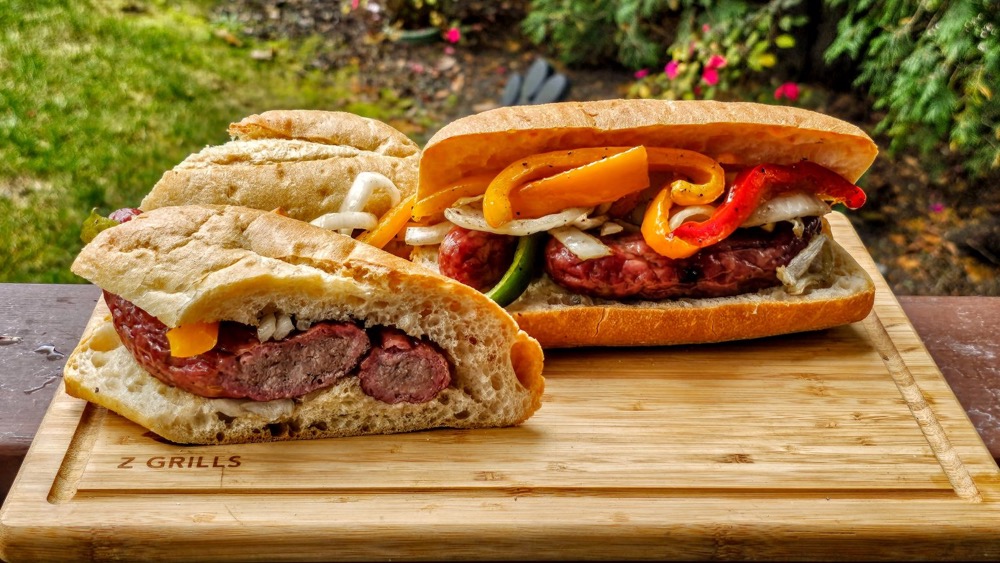
Dry-Aged Steak is Better with Z Grills
If you’re still pan-frying your steaks, you’re missing out! Why go to all the effort of dry-aging your beef when you’re just going to cook it on the hob? With a Z Grills pellet grill, you can take the flavors of your dry-aged steak to the next level, sear and grill, and produce hundreds of other delicious recipes that will get your tastebuds singing!
To view some of the delicious beef recipes you can prepare with a Z Grills pellet grill.
To upgrade your steak and grilling game, check out our latest offers on our grills here and join the Z Grills foodie family.